
FoxCSV
Questions answered by this recipe
How can I
- create super simple tables,
- display csv data in multiple ways and different locations,
- create custom displays of data, without adding wiki markup to the source text containing the csv data,
- create custom queries or filters to display only parts of the csv data,
- easily edit data items in a csv table,
- change the separator/delimiter characters in an entire csv table,
- add columns and remove columns from a csv table,
- save sums of column values as PTVs for use elsewhere,
- convert csv tables into PmWiki simple tables?
Description
FoxCSV can parse and display csv data from a source page or page section or a csv file, using built-in or custom templates. This provides complete separation of data and the way it is displayed. Data can be filtered using custom queries on one or more fields. It can be sorted and ordered easily in a number of ways. Button for editing and deleting records can be added. Csv files can be directly edited, or imported. Forms can be set up to create new csv rows in the source text. The display is restricted to one source for each foxcsv markup.
Installation
Download foxcsv.phpΔ and add to your cookbook and include in config.php in the usual manner. Make sure Fox is installed and set with the right permissions. A new foxaction 'csv' is added to Fox (2023-11-07), which facilitates line deletes in the csv source text. FoxCSV can provide a delete button for this, which can be added via the display template to appear beside every data row. Make sure the permissions are carefully set, use conditional markup to only provide row delete buttons when authorised as editor.
Download foxpub.zipΔ and extract fox.css and edit and delete icons, and copy to pub/fox/ folder. The css file contains a few css rules for the display of the FoxCSV action buttons and csv tables.
Configuration
A few configuration variables can be set in config.php before the script is included. Here is the default config array showing the key names and default settings [version 2026-02-20], Each pair of key/value can be set with $FoxCSVConfig['<key>'] = '<value>';
SDVA($FoxCSVConfig, array(
    'sep' => '', //default separator/delimter character. Empty so FoxCSV can determine sep from data, without need to use sep= parameter
    'nl' => '', //new line (line break) character, for fields using multi-lines
    'case' => 0,  //case-insensitive queries, set to 1 for case-sensitive queries
    'regex' => 0, //simplified pagelist-like wildcards in queries. Set to 1 to use regular expression query patterns
    'header' => 1,//no column/field headers included in data rows. Set to 1 to include a row of header names
    'hideidx'=> 0, //default is to show index as column in auto templates
    'idxname'=> 'Row', //default name for IDX
    'textname' => 'Text', //default name for Text header field
    'datename' => 'Date', //default name  for TMX header field
    'datefmt' => "Y-m-d @H:i", //default date/time format for TMX field
    'ptvsum-suffix' => '_SUM', //default suffix for PTV sum names
    'popups' => 1, //set to 1 to enable popup confirmation dialogues
    'order' => 'natcase', //default sort order keyword
    'sortable' => 1, //default class=sortable (sorting via js) for auto tables
    'buttons' => 1, //by default show add, edit and delete buttons if authorised to edit
    'editheaderbutton' => 1, //include edit header button
    'addbutton' => 1, //include add item button
    'deletebutton' => 1, //include delete item buttons
    'buttonicon' => 1, // use button icons (if images are found with url)
    'editiconurl' =>   "$FarmPubDirUrl/fox/edit-icon.png", //url path to icon image
    'addiconurl' =>   "$FarmPubDirUrl/fox/add-icon.png",
    'deleteiconurl' => "$FarmPubDirUrl/fox/delete-icon.png",
    'saveasnew' => 0, //set to 1 to show 'Save as New' button in edit form
    'reindex' => 0, //by default no automatic re-indexing of IDX fields when adding new items
    'new' => 'bottom', //by default new entry to bottom, set to 'top' to put new entry just below header row
    'env' => 0, //set to 1 to enclose each item in double quotes
    'copycsv' => 0, //set to 1 to show form for copying/importing csv/txt files
    'fileedit' => 1, // set to 0 to inhibit file editing (no writing to files, only to wiki pages)
    'decimals' => 2,      // decimal places for 'num' fields number format
    'decisep' => '.', // decimal separator for 'num' fields number format
    'thousep' => ',', // thousands separator for 'num' fields number format
    'popedit' => 0, // set to 1 for popup (fixed position)  edit form
    'popbottom' => 0, //set to 1 for bottom  popup edit form position, instead of top position
    'popmax'=> 10, // sets maximum of popedit columns (fields in each row)
));
Internationalization (to be updated)
The following strings can be translated in an XLPage: There are a great number of strings associated with action form buttons in the script, which can be translated. Not all have their definitive wording as yet.
Usage
Overview: CSV text as data source
Csv text can be copy/pasted into any wiki page or anchored page section, or imported from an uploaded (attached) csv text file, or it can be generated in a page via a custom Fox form, or indeed the inbuilt Fox form.
The csv format uses a single character as item separator/delimiter, by default FoxCSV uses a semi-colon. Items can be enclosed in "quotation marks", which will not be shown in the display. If a separator character is part of a value, part of a string input, then that input will be automatically enclosed in quotation marks "...". If quotation marks are part of a string input, then these marks will be escaped with an accent character (`"quote`").
The first line of the csv text is used for header fields, and the names used must consist only of alphanumeric characters plus hyphens and underscores, and must start with a letter. The names are case sensitive, and used as template variable names by FoxCSV. If csv text gets imported, it is important to check the header row will meet these criteria. Edit the page text accordingly.
FoxCSV does not render line breaks in csv data items, it will fail if such are present. It needs to have each csv record on a single line of text. But by using a double backslash '\\' as a token, line breaks in items can be displayed. The automatic edit form will adapt accordingly. See more: Multiline display and edit
Markup
To display csv data use a markup directive or expression. Both use the same parameters. The markup expression is chiefly for use in templates used by a Fox form for displaying the results of queries submitted via text input boxes (similar to a PmWiki search box, but aimed at the csv data text as the source). field1, field2, etc below refers to header names of columns.
Syntax [optional items in square brackets]:
- Markup directive
-
(:csv [source=]<pagename> [template=<pagename>] [sort=<field> ] [query="<field1=...> field2=...>..."] [sep=","] [field3="..."] ...:) - Markup expression
-
{(csv [source=]<pagename> [template=<pagename>] [sort=<field> ] [query="<field1=...> field2=...>..."] [sep=","] [field3="..."] ...)}
The source and template parameters can point to page sections, like template=Site.FoxDisplayTemplates#csv. The template can be omitted, in which case FoxCSV will generate automatically a simple table, including table header with class 'sortable'. The source needs to be set, but can be set without the source=, as a first argument. An example for a short markup, with a default semi-colon csv separator/delimiter:
- Short markup directive
-
(:csv <source>:) -
(:csv [Group/]<filename.csv> sep=.. [copycsv=1] [other optional parameters...]:) - csv text files can be opened and displayed, sorted, filtered etc, but not edited. Upload a csv file in the normal way, via Attach upload action or
Attach:filename.csvmarkup, and import it using parametercopycsv=1to show a copy/import form to set a target page.
Displaying a single entry/value/item of the csv table:
-
{(csv <source> <columnname>/<rowidx> [sep=..] )} - will display a specfic entry/cell of the csv table, referred to by header name and row idx number. Instead of header name the column number can be used. Note the slash, and no spaces, between name and row index. Do not use this method of data extraction extensively, as it may slow down performance!
Optional parameters
-
show=<field1>,<field2>,<field3>,.. - will show the named columns in an automatic table (no template is set). Useful to restrict display to certain columns. By default all columns are shown. Alternatively if
show=-<field1>,<field2>,...(minus sign in front of the name list) then these columns are not displayed. Use one or the other way, not mixed (set what should be displayed OR what should be excluded). -
header=1orheader=0 - will show or not show a header row. By default a header will be shown for automatic tables, and not shown for when a template is set (assuming a header row is provided with markup).
-
hideidx=1 - will hide the index column (if it exists).
-
idxname=<name> - Setting a display name for the index header. By default Row is used, instead of the real name IDX.
-
textname=<name> - Changing display name for header field 'Text' (used automatically when a .txt file gets displayed). Same syntax as for 'show=' parameter.
-
multiline=<field1>,<field2>,.. - sets edit text input to multiline textarea for fields of specified columns. For use with automatic tables, or for templates within csv-edit markup.
-
sep=<char> - for setting csv item separator, according to what is used in the csv text, but usually not needed, as the script attempts to determine the separator automatically.
-
nl=<char> - for setting line-break token, according to what is used in the csv text, but usually not needed, as the script attempts to determine the line break token automatrically, or will default to '¦' (split pipe) character.
-
env=1 - enveloping fields with "quote marks" at start and end. Default is 0, no envelope with quote marks, unless it is needed, when separator characters are part of the field value.
-
sort=<field1>[,<field2>,<field3>]... - to set <field1> <field2> as the base for sorting the csv display table. A minus sign in front of the field name will reverse the sort order. Sorting rows by up to four fields (4 levels deep) is possible.
-
order="<sorttype> <field1>=<sorttype> <field2>=<sorttype> ...." - to set specific types of sorting, generally or field specific. See below under Sorting.
-
query="..."orq="..."orfilter="..." - to provide filtering of data rows by a query string for general queries on all fields. See also query options below.
-
<field3>="..." <field4>="..." - to provide query strings for fields using their csv header names. These can be an alternative to using the
query="..."parameter. Very useful if a Fox query form is set up. Example see under Query and Filters. -
count=... - extract subset of data rows. Syntax is the same as for pagelist count= parameter. count=1..10 first 10 data rows, count=11..20 next 10 rows, count=-10.. last ten rows.etc. , read more: count=, just substitute "data list" for "pagelist", and "data rows" for "pages".
-
sum=1orsum=field1,field2,..orsum=-field3,field4,.. - adds a foot row with calculated sums of the columns for auto tables. sum=1 sets sums for all columns, the second just for the named fields, the last with minus in front of arguments will set sums for all fields except those listed after the minus.
-
num=1ornum=<field1>,<field2>,<field3>,.. - display of formatted numbers on selected columns. Default is English wih two decimal points. Values will be right-aligned automatically.
-
decimals=.. - Numeric values will be shown rounded to the number of decimals set, default is 2. Setting to 'auto' will display numbers with whatever decimal places are needed, and suppress trailing zeros in fraction part.
-
deci<n>=<field1>,<field2>,... - Sets <n> decimal places for selected columns.
deci0=..., ... todeci9=..: display number with zero up to 9 decimal places.deci10=..: display number with whatever decimal places are needed, no trailing zeros. -
decisep=.. - Decimal separator, either dot (.) (default), or comma (,)
-
thousep=.. - Thousand separator character, default is comma (,)
-
ralign=1orralign=<field1>,<field2>,..orralign=-<field3>,<field4>,.. - right aligns cell content for auto tables, either for all columns (=1) or for named columns, or for all columns except named columns, with minus sign in front.
-
calign=1orcalign=<field1>,<field2>,..orcalign=-<field3>,<field4>,.. - centre align cell content, same ways as ralign.
-
sortable=0 - will suppress the javascript sortable function from auto tables (removes the class='sortable').
-
filterable=1 - will add a filter input field to table. Needs ExtensionHub and Filterable extension installed (adds class= ' filterable').
-
class='custom' - will add a 'custom' class to auto table. Default is 'csvtable'.
-
buttons=0 - will suppress the display of add, edit and delete buttons in auto tables. Previously named 'editlinks'.
-
icon=1oricon=0 - will show icons instead of button label text, or not show icons and show label text instead.
-
editheaderbutton=0 - suppress button to edit header names in auto tables.
-
addbutton=0 - suppress button to add items in auto tables.
-
deletebutton=0 - suppress button to delete items in auto tables.
-
new=top - will add new item to top, just below header row. Default is to add to bottom.
-
saveasnew=1 - will display a 'Save as New' button in edit window, to save item as a new item to bottom of table. If new=top is set, item will be saved to top of table.
saveasnew=abovewill save item just above the item opened for edit.saveasnew=belowwill save just below item opened for edit. -
copycsv=1 - for auto tables will display a copy form, to copy displayed csv as csv to different location, page or page section. This enables import of csv files to wiki page, where csv can then be edited, or further filtered etc.
-
toolbar=1 - Displays a toolbar with all csv action forms, if logged in as admin.
-
base=1 - set this parameter to redirect any edit to the page displaying the table, rather than the page containing the csv data. Usefl if data is on a different page.
-
popedit=1 - enable popup (fixed position) edit form.
-
popbottom=1 - place popedit from to bottom of window, default is top of window.
-
popmax=<num> - set maximum number of edit fields in a horizontal row for the popedit form. If more fields are there thy wrap into a second row. Example: set to 5 will show in the pop edit five input fields each with 20% width of window.
-
popcols=<csv string of numbers> - a csv list of numbers indicating percentage width for the popup edit fields. Example: popcols=10,20,20,10,5,5,30,10 for formatting the popedit form for 8 fields with respective window width in percent (10% 20% 20% ..etc.)
-
poprows=<number> - setting textbox row number (height) for popedit form.
-
eshow=<field1>,<field2>,<field3>,.. - show the fields listed in edit form. Start list with minus sign to NOT show those fields. This works like the
showparameter, but for the fields appearing for editing. Works for popup edit form and the classic edit form. -
eidx=1 - include the index field to show in the edit form, but not for editing. Default is that the index numbes are hidden.
-
csvtitle='<title for table>' - set a table title (heading), which shows above the table and also shows in the built-in edit forms (classic and popup). In a template this will be picked up by the special template variable
{$$TITLE}. -
datename=<name> - set a different name for TMX field, default is 'Date'.
-
datefmt="<date format string>" - set a different format for date/time displayed from TMX field. Format is according to PHP date() function, not PmWiki 'ftime' format.
Styling the popup /fixed position or classic edit form
The edit forms using style injection to appear in the choosen position (popup edit) and appearance. To change background and border colours (important for popedit form) the easiest way is to put the following into config.php and adjust for instance the hue (first number in the hsl() function:
$HTMLHeaderFmt['csvedit'] =
     "<style> #csvedit {background-color:hsl(50 100 97); border:2px solid hsl(50 100 60);}
     .ebuttons input {background:hsl(50 100 92); border-radius:5px; padding:0 4px;}
     .ebuttons input:hover {background:hsl(50 100 80); cursor:pointer;}
     </style>";
Display templates
FoxCSV can display csv data either automatically via an inbuilt simple table template, or through custom display templates, which is great for output requiring a high degree of customisation, like custom formatting.
We use similar variable syntax for display templates as for Fox form templates. Template variables like {$$Fieldname} are used. Each gets substituted for data values according to the <Fieldname> in the header row (first text row) of the csv. Make sure the header names are words and without spaces, but can contain underscores, hyphens and digits, like Name, Email, Home-Phone, Address_1.
Use template processing directives to set up table header and foot rows:
-
(:template first:) - what follows this directive will be processed first, before or as table header row. Set your custom table headers here. Add markup for
(:csvform-edit :)and(:csvform-delete ..:)if add, edit or delete button markup is used below. -
(:template each:) - what follows will be processed as table data rows. Customise row output here, set here custom styles and field replacement variables and edit and delete buttons.
-
(:template last:) - what follows will be processed last, as a footer or last table row. Set any template variables like
{$$SUM_<field>}or any footer text here.
[[#template]]
(:template first:)
!!!{$$TITLE}
(:csvform-edit {$$SOURCE} <any parameters> :)(:csvform-delete {$$SOURCE} :)
||class=sortable-footer
||! No.||!Date ||!Item ||! Price||!Comment || ||
(:template each:)
|| {$$IDX}||{$$Date} ||{$$Item} || %red%{$$Price}||''{$$Comment}'' || (:button-edit idx={$IDX} :) (:button-delete idx={$$IDX}:)||
(:template last:)
|| || || Total:|| '''%red%{$$SUM_Price}'''|| || ||
[[#templateend]]
|
Other template variables can be added. FoxCSV specific template variables:
-
{$$IDX}and{$$SOURCE} - used in the row delete button and edit button markup to provide idx number and target/source for the forms.
-
{$$CNT} - for use in a row to give a counter number, like a numbered list.
-
{$$SUM_<field>} - for calculating a column sum. <field> needs to be a header column name.
-
{$$TITLE} - for showing a table title text set within
(:csv ... :)markup with parametercsvtitle='<title text>'. -
{$$PIN}orpin={$$PIN} - for setting a process id number (pin) in add/edit/delete button markup and edit/delete form markup to pin the button to the form. Normally FoxCSV sets this automatically and there is no need to inseret it manually.
For a custom Fox form to add a new csv data row, if required, an index field can be set up: The header row needs to be set with IDX as first header item, and in the template a markup expression used to provide the correct new row index number, like {$$(newidx <source>)}
When no template parameter is set, the inbuilt simple table template is used. This will carry a class='sortable csvtable' attribute, and if sortable tables are enabled in config with $EnableSortable = 1;, those tables are sortable by clicking a header name. The auto template also generates a delete and an edit button for each row. If a template is used, those could added to the template if required. See Editing csv items
Sorting
Row sorting can be done using parameter sort=<field1>[,<field2>[,<field3>]].... Specify one field to have the rows sorted according to the values in that column, or up to four fields to further sort rows according to values in the second, then the third, then the fourth column, for a nested sorting. If a minus sign is placed in front of a field name, the sort order is reversed for that column. String the names together with no spaces, just with a comma separating each.
The ordering is done by default in a natural order, and case insensitive. Other ordering modes can be set with parameter order="<sorttype> <field1>=<sorttype> <field2>=<sorttype> ....". You can set a sort type for a specific field, like name=type, or generally with out a name= prefix for all the fields set by the sort=... parameter. A minus in front will result in a descending sort order.
Sort types are set by using one of the following keywords. The default set via $FoxCSVConfig is natcase, a case-insensitive natural string ordering.
- regular or reg : compare items normally (don't change types).
- natural or nat : compare items as strings using "natural ordering".
- natcase : compare items as strings using "natural ordering" and case-insensitively.
- string or str : compare items as strings.
- strcase : compare items as strings and case-insensitively.
- numeric or num : compare items numerically.
- locale or loc : compare items as strings, based on the current locale. It uses the locale, which can be changed using setlocale()
Queries & Filters
Queries or filtering can be done by adding to the csv display markup a parameter query="..." or q="..." or filter="..." (they are equivalent), or using header field names as parameter names. The first will perform searches in any field (i.e. general), the latter in the fields specified by the header name (i.e. column specific). These methods can be combined.
Parameter syntax shown in examples:
-
query="A*,*foo* -*bar*" - This will result in a display of all csv entries starting with A, or having foo in them, looking in all fields, but excluding entries with bar in them.
-
q="Name=A* Email=*gmail* -*bar*" - This will display entries with field Name starting with A and entries with field Email containing foo, but excluding any entries with bar contained in any field.
-
Name=A* Email=*gmail* q=-*bar* - This will do exactly the same. Note the use of header names as parameter names, in order to do field specific queries. This is especially useful when setting up a Query fox form, using text input for various fields.
By default queries/filtering is done case-insensitive, so it does not matter if a query is entered all in lower case letters. Set case=1 to make them case-sensitive.
Using Wildcards in query strings is the same as used in PmWiki pagelist and page searches:
- An asterisk (*) represents zero or more characters
- A question mark (?) represents exactly one character
- A set of characters enclosed in square brackets ([]) represents any one of the characters in the brackets
- A comma separates different specifiers, of which at least one should match.
- A minus sign before a specifier requires it to be absent.
When parameter regex=1 is set, FoxCSV expects the query strings to be regular expressions, not the simpler default syntax outlined above.
Filter or Query? I like to use the term Filter in use with the markup directive, and Query in use with the markup expression in a form template for a query form, when a user can conduct a query. But the parameter names are equivalent.
Editing csv items
Form buttons can be used for editing csv records, or adding new ones.
Markup for edit form buttons in display template:
-
(:csvform-edit {$$SOURCE} <parameters>:) - for
(:template first:)section. This markup provides the form which the submit button (via the button-edit markup, see next) uses. Button and form are linked, even though th ebutton does not need to be placed inside form tags.
: (:button-edit {$$IDX}:) or
(:button-edit idx={$$IDX} label='Edit' title='Edit item {$$IDX}':): for(:template each:)section.
The title parameter is for a custom tooltip.
If $FoxCSVConfig['editiconurl'] is set to point to a suitable image location, and $FoxCSVConfig['buttonicon'] = 1; is set, then an icon is show instead of a button with label text. Parameter icon=0 or icon=1 can also be used to switch icon or label for a button.
For css styling we can use several classes to control display.
Parameter source=<source> can be given just with <source>, as the first argument. Parameter idx={$$IDX} or simply {$$IDX} as first argument in the button markup must be provided! The text label can be omitted, to use the default Edit, or an icon.
A short form of markup for a submit button in a template can be:
(:button-edit {$$IDX}:)
To prevent unauthorised editing make sure that $FoxAuth is set correctly. Default is 'edit' as authorisation level. If you want users to be able to add and edit csv items (rows) on a page, but do not wish to grant them edit authorisation for the whole page, then consider adding an extra level like 'post'. See AddingAuthLevels.
Adding a new row with csv data
Either use a edit button form, or use a custom Fox form. When using automatic tables, with no external template set, an add new link is provided, when logged in as editor. When using a template, it can be included with markup:
-
(:button-add new label='Add new':)or(:button-add bottom label='Add new':) - link to open an automatically generated form with all header fields as text input boxes, to fill data and submit as new row entry. If
idx=topis used instead ofidx=bottom, then the new csv row will be added to the top, just below the header row, instead of the default, which is to the bottom. For automatic tables this can be achieved by adding parameternew=topto the csv directive:(:csv <source> new=top ...:)
New rows can also be inserted below any existing row. Use idx=belowID or idx=aboveID with ID being the row number or index number of the row the new row is going to be placed below or above. This can be used also for template edit links using the IDX variable, for instance like
(:button-edit idx=below{$$IDX} label='insert new':)or(:button-edit idx=above{$$IDX} label='insert new':)
- Custom Add new form
- In a custom form text input fields can be provided for any fields one wishes to add data to, but note that any others need to be present as hidden input fields, in order that the whole row added is consistent with the field structure of the csv table. See Example below.
Setting new index number:
- The automatic edit form will also provide a new index number, if the csv table is indexed with an IDX field. The new index number will be one higher than the highest index number found, so any gaps in the numbering/ any missing rows, will not upset the indexing.
- For a custom Add new form, if an IDX column is used, a markup expression
{$$(newidx <source>)}can be used in the template.
Multiline text input and display
FoxCSV does not render line breaks in csv data items, but needs to have each csv record on a single line of text. By using a double backslash '\\' as a token one can display line breaks in record items. This works when using automatic tables, or when using templates with advanced table markup. Simple table markup cannot cope with line breaks inside cells.
When using automatic tables and editing a record, any item which contains backslashes will appear in a multiline textarea input control, and text with line breaks will be saved with backslashes as tokens in the csv data row. The edit form automatically adapts to show text or textarea input fields according to the absence or presence of backslashes in the text string.
It is possible to force multiline textarea input for specific or for all fields, even if no backslashes are present, by adding parameter multiline=<field1>,<field2>,... to the (:csv <source> ...:) markup. Setting multiline=1 will force all text input fields to multiline textarea fields. Using a minus sign in front of a field name will exclude that field from being a textarea input and remaining a single line text input, whereas the others are multi-line. This parameter is particularly useful to set up the automatic edit form for adding new records, where some items may be single line, others may be expected to always be multi line.
Deleting a row
FoxCSV provides a row delete markup. Note that FoxDelete is not used. If no template is set in the (:csv <source> [sep=..] :) directive, then row delete buttons are automatically generated as part of the display.
Row delete button template markup:
-
(:button-delete idx={$$IDX} [label='...'] :) - This can be put into the template in a table cell to provide an individual row delete button for each row. But note that the button markup directive
(:button-delete {$IDX} '..:) needs the csvform-delete directive in the %fox pmhlt%[@(:template first:)section!
idx=...: needs to be set.target=...: target needs to be set, but can be given as a first argument without preceeding target=. Target points to the source text, either a page, or a page section.label='...': is optional. The default label uses an X as button label.
The template variables {$$IDX} and {$$SOURCE} are special and will get substituted for each row with the source page name (including section if that is used) and the row line number as special index. With this info each generated delete button can target the specific line in the source text for deletion. Note that this will not be the case if the source text gets changed meanwhile. The csv source does not normally carry specific markers for each row, as Fox would normally generate to use with FoxDelete.
By using a special indexbutton (as form) indexing of a csv table can be done with one click. (see Modifying csv tables below about index).
FoxCSV delete form buttons carry some risk if there are updates to the csv text happening from other users at the same time. Indexed csv data is less at risk, since the delete button aims at a line row with a specific index number. Even if by other editors rows get deleted and the page has been changed, the delete action will still aim at the same line row. — On the other hand the wiki page keeps a history, and accidental deletes can be reversed, which is much better than if we would edit a csv file directly.
Adding Unix time stamps
You can add a unix time stamp by inserting in the csv header a field named TMX. If you use auto tables, then this is all it needs. Now when adding a new item/record, or editing an existing one, FoxCSV adds a Unix timestamp. This is displayed in a table under a 'Date' header. You can set a different name for this with parameter datename=.... The timestamps get displayed in a default format. Setting a parameter datefmt="<format>" will display this in a diffeent format. The format string needs to be according to the PHP date() function, not the strftime() function. Read more on php date and time
For custom display templates you use the template variable {$$TMX}. Add this to where you want the date/time to show. Put it into a markup expression like {(ftime @{$$TMX} )}, with added fmt=... parameter if needed (see Markup Expressions for 'ftime'). Note the '@', to indicate to MX ftime that it reads a unix timestamp. Additionally, if using a custom edit form, for automatic saving add {$$TMX} to the foxtemplate string, and add a hidden input like (:input hidden TMX "{$$(ftime %s)}":). This will ensure a Unix timestamp is generated of the time when the form gets submitted. In your csv data it should show as a ten digit number in the TMX column. The %s in the ftime expression indicates formatting time to a Unix 10-digit string. You could choose to rather save the time in a readable format, and not use a markup expression to format for the display. But the Unix timestamp number gives full flexibility to change the display format when needed.
Modifying csv data
Import and copy
-
(:csv [Group/]<filename.csv> copycsv=1 sep=.. ...:) - The
copycsv=1parameter causes a copy form to be shown, to set the target location for a csv file or data copy. Other parameters can be set, to filter the data, or restrict the columns displayed via theshow=..parameter. Only the data displayed will be copied. One can set parameternewsep=..to specify a different separator/delimiter for the copied data. Once the copy is done, visit the target page to check the result, perhaps do some editing of the column header names, since an uploaded source file may contain spaces and invalid characters in the header fields.
FoxCSV tries to correct invalid characters automatically, so some editing may be necessary. Header names need to begin with an alphabet character, not a digit, and cannot contain spaces or other punctuation marks, or non-ASCII characters. Hyphens and underscore characters are allowed.
When $EnablePostDirectives = 1; is set in config, Fox is allowed to post directives, and for the csv data copy a markup (:csv #data ..:) is added on top of the copy, plus a #data anchor, in order to display the data automatically as a simple table, including header edit and row edit and delete links, when viewing the page.
Lastly, copying of (filtered) data can also be done from ordinary csv sources on other pages or page sections. It is one other way of modifying csv data tables, by creating modified copies of the original (so not strictly cloned copies, but subsets or sets with different arrangements).
Many other actions on an entire csv data table can be achieved via markup for special inbuilt Fox forms (mostly in shape of single buttons).
add toolbar with action forms
-
(:csv <source> toolbar=1 ... :) - adds toolbar with all the action forms detailed below in it.
add index column
-
(:csv-index <source> [<sep=..>] :) - : create index fields for csv table without indexes. Add
new=topas parameter to index in reverse order, newest row at top.
This csv action adds a column with index numbers, with 'IDX' in column header field.
re-index index column
-
(:csv-reindex <source> [<sep=..>] :) - reindex a csv table which has index fields, renumbering the row lines. Add
new=topas parameter to reindex in reverse order, newest row at top.
This renumbers the rows, if they had been indexed already. Useful if rows got deleted and consecutive row numbering is required/desired.
reformat, change separator
-
(:csv-format <source> [sep=..] :) - replace existing separator with a new one for all data items of the csv table.
Useful for instance for converting a comma delimited table to a semi-colon delimited table. Make sure there are no instances of the new delimiter within any of the data! Reset the display markup with the new delimiter (sep=..). This action is also useful if a table gets pasted into a wiki page which has tabs as delimiters. These tabs can be converted into semi-colons for instance (sep=\t newsep=;).
create PmWiki simple table
-
(:csv-table <source> [sep=..] :) - convert a csv table into a pmwiki simple table.
This conversions creates a table with a header row with simple table markup. The 'IDX' header is renamed 'Row'. If your csv data contain '\' character tokens as line breaks, those multi-line content will not be rendred multi-line. Simple table markup allows just single line content for each cell.
trim enclosure quote marks and white spaces
-
(:csv-trim <source> [sep=..] :) - trim any white spaces from start or end of csv items in the csv table, and remove enclosure quotation characters, if not needed.
White spaces following the separation character can foul the csv parsing.
add enclosure quote marks
-
(:csv-quote <source> [sep=..] :) - add quotation marks at start and end of every field.
add new column
-
(:csv-newcol <source> [colname=..] [col=..] [sep=..] :) - add a new column to the csv table by providing a column name and position where column should be added.
delete column
-
(:csv-coldel <source> [col=..] [sep=..] :) - deletes entire column, including header, from csv table. The column number needs to be given.
ptv sums
-
(:csv-ptvsums <source> [ptvtargetl=..] :) - creates and updates PTVs of sums of columns in a text section. Default section is same as source with suffix '-sums' (like #data-sums), or can be specified with ptvtarget= parameter. The section needs to be created manually by adding the anchor for it into the target page!. FoxCSV will create hidden PTVs of all columns of the table. Each PTV is named as the column header name plus a suffix, which by default is '_SUM'. The default can be changed in config via a
$FoxCSVConfig['ptvsums-suffix'] setting.
Examples
Creating super simple tables
This could be a To-Do list, Contacts list, Appointments list, Account list... any table where you want to add rows with items created by a simple edit form with text fields as input, and where you want to be able to edit items easily, or delete whole rows. The example here is a kind of job list, create a row with header names as required:
(:csv #data:) (:if false:) [[#data]] IDX;Date;Time;Job;Description;Hours;Price |

This is enough to create a list in simple table format. Note the icons for editing. The left one is for editing the header row, the right one for adding a new data record (row), opening an edit form. The data submitted will be added to the #data section as csv rows. New rows will then display a delete and edit icon for the editor.
Display of automatic table
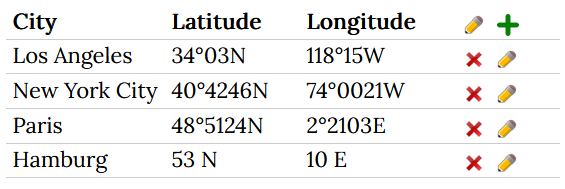
Short markup, no template, with data on same page
(:csv #data:) (:if false:) [[#data]] City,Latitude,Longitude Los Angeles,34°03′N,118°15′W New York City,40°42′46″N,74°00′21″W Paris,48°51′24″N,2°21′03″E [[#dataend]](:ifend:) |
will render like this:
Display of contacts using a template
An example of markup on a page to display contacts. The display template for use with it is included underneath in an anchored section, which is hidden via conditional markup. The template also includes markup for row delete buttons and edit links, and an edit link in the header row to add a new entry. Note the second conditional markup, which is nested in the first, therefore it needs to be indexed. The index numbers of the IDX column in the source data is not displayed.
(:csv source=Contacts#csvdata template=#contactlist sort=Name :)
(:if false:)
[[#contactlist]]
(:template first:)
(:csvform-edit {$$SOURCE} :)(:csvform-delete {$$SOURCE} :)
|| border=1 width=100%
||!Name ||!Email ||!Phone ||(:csv-edit {$$SOURCE} idx=new label=Add:) ||
(:template each:)
||{$$Name} ||[[(mailto:){$$Email}]] ||{$$Phone} ||(:if2 auth edit:)(:button-delete {$$IDX} icon=1:)(:button-edit {$$IDX} icon=1:)(:if2end:) ||
[[#contactlistend]]
(:ifend:)
|
Sample of csv contact data, normally this would have lots more columns, but using a template for display one can choose which columns to display, and which rows via a query/filter. An index column is added as first column, with name IDX. This is optional, but helps safer data editing.
[[#csvdata]] IDX;Name;Email;Phone 1;Bob the Builder;bobby@example.com;01234567; 2;Carla Summer;info@xyz.net;07654-32198; 3;Adam Meyer;am@meyerexample.org;+007 008987; [[#csvdataend]] |
Form to submit a query (search)
An example of a Fox form for queries of a csv text on a different page. This query form has just one text field to enter a query about the Name fields. Others could be added. The Fox form template is underneath, as well as the FoxCSV display template. In this example the form writes the query result into an anchored section named result. Subsequent queries will just overwrite this added content. Note that by submitting an empty query all of the csv data rows will be displayed.
(:fox csv foxaction=replace put=overwrite target=#result template=#temp:)
(:input default request=1:)
Enter Query: (:input text arg1:) (:input submit post Submit:)
(:foxend csv:)
(:if false:)
[[#temp]]
||border=1 {$$(csv Data.ContactsCSV template=DataTemplates#displaycontacts sort=Name Name='{$$arg1}')}
[[#tempend]]
[[#displaycontacts]]
||{$$CNT} ||{$$Name} ||[[(mailto:){$$Email}]] ||{$$Phone} ||
[[#displaycontactsend]]
(:ifend:)
[[#result]]

[[#resultend]]
|
A custom edit form and 'add new item' form
csv markup directive, with parameter template= to load custom display template:
(:csv #data template=#tmpl:) |
csv data sample in an anchored section:
[[#data]] AAA;BBB;CCC 100;200;300 400;500;600 [[#dataend]] |
Display template used by the csv markup:
[[#tmpl]]
(:template first:)
(:csvform-edit {$$SOURCE} :)(:csvform-delete {$$SOURCE} :)
||
||!Row||!AAA ||!BBB ||!CCC || (:button-add new form=#eform1:)||
(:template each:)
||{$$CNT} ||{$$AAA} ||{$$BBB} ||{$$CCC} ||(:button-delete {$$IDX}:)(:button-edit {$$IDX} form=#eform1:)||
[[#tmplend]]
|
Note the csv-edit directive uses a form= parameter to call a custom edit form. The template in this example uses simple table markup, and a first column 'R' for just showing row numbers (an IDX column would be another alternative, or simply omitting this column).
Edit form template used by csv-edit in above template:
[[#eform1]]
(:fox eform  foxaction=csv csvact=replace target={$EditSource}{$EditSection} csvidx={$EditItem}:)
(:foxtemplate "{$$AAA};{$$BBB};{$$CCC}":)
edit AAA: (:input text AAA:)
edit BBB: (:input text BBB:)
(hidden CCC) (:input hidden CCC:)
(:input submit post 'Save':) (:input submit post2 'Save as New':) (:input submit cancel 'Cancel':)
(:foxend eform:)
[[#eform1end]]
|
'Add new item' form template used by csv-edit in above template
[[#addnew1]]
(:fox addform  foxaction=csv csvact=addnew target={$EditSource}{$EditSection} csvidx={$EditItem}:)
(:foxtemplate "{$$AAA};{$$BBB};{$$CCC}":)
edit AAA: (:input text AAA :)
(hidden BBB with a default value:)(:input hidden BBB 999:)
edit CCC: (:input text CCC:)
(:input submit post Save:) (:input submit cancel Cancel:)
(:foxend addform:)
[[#addnew1end]]
|
Notes to this example: The edit form is a Fox form.
- Note the use of Page variables
{$EditSource},{$EditSection}and{$EditItem}{$EditSource}delivers the data page name (source and target),{$EditSection}delivers the anchored data sections, so both together form the target.{$EditItem}delivers the row index.
One can also use any of these also as text, headers etc for the form.
foxaction=csvdirects Fox to use the special functions for updating contained in foxcsv.php.csvact=replacespecifies for Fox to do a replacement, swapping original row text for updated row text.(:foxtemplate "{$$A};{$$B};{$$C}":)mirrors the structure of the data rows, and uses template variables for the csv header names.- The
(:input text ...:)and(:input hidden ...:)controls are for editing fields or passing on field names which will not be edited (hidden). These can be displayed in a fully customised manner. Any csv fields which are not for editing must be added as hidden inputs in the form! (:input submit post2 'Save as New':)adds a 'Save as New' button. This is functional if$FoxCSVConfig['saveasnew'] = 1;is set, and the data of the item in the edit form will be added as a new item. If the location for these additions shall be other than at the bottom of the csv table, then add a control(:input hidden saveasnew top:)for addition to top, or use a value of above or below to save just above or below the row with the item in the edit form. When data gets posted via the post2 'Save as New' buttoncsvact=replacegets automatically changed tocsvact=addnew- This is a simple example. Obviously the templates and the csv data can reside on different pages, or hidden with
(:if false:)directives. - If your template is written between two page anchors (for instance between
[[#eform1]]and[[#eform1end]]in the example), AND this template contains other page anchors for some reason, THEN the form parameter needs to contain both beginning and end anchor, for instanceform=#eform1#eform1end.
Notes
Text file import
-
(:csv <filename.txt> [query=...] [template=...] ...:) - FoxCSV can display files of type .csv and .txt. Primarily build for csv display and query, text files can be treated as if they were csv, with each line of text being a Text field. Text will be used as the header field name, which can be hidden with parameter header=0, or by using a custom template. If a query/filter is set extracts from the text can be generated, and also imported/copied to a page location.
To do / some day / maybe
Change log / Release notes
- 2026-03-03: Added options to add new item (row) above or below an existing row Added 'top' and 'bottom' keywords for adding new to top or bottom. Added automatic reindex option when new items get added. Added auotfocus to first input box in inbuilt edit forms.
- 2026-02-25: Added TMX special field option for unix timestamp save, and formatting option for date/time display. Added poprows option to set height of any textareas within the popedit built-in form. Fixed indexing bug when inserting new record below an existing one. Fixed a bug with reverse indexing.
- 2026-02-24: Added wrapper div with id-csvedit for custom edit forms to make it easier to set up popedit custom forms. Added
{$$TITLE}replacement variable to be used inside custom edit forms. Changed preprocess function to allow adding of new items from a custom edit form, correcting IDX update. - 2026-02-23a: Fixed display bug with custom edit forms. Fixed csvtitle bug with custom edit forms. Fixed bug with class name of csvform-edit forms.
- 2026-02-23: Fixed delete bug, fixed bug with redirect. Made PIN insertion automatic, so no real need to use
{$$PIN}template variable. Rebuild cod efor edit and delete markups. - 2026-02-20: Major code update with changes to add/edit/delete buttons using HTML
<button>tags for cleaner HTML output, possibly requiring adjustments to config and template settings! Added template variables{$$TITLE}and{$$PIN}. Changes to button markup. Changes to button icon settings. More added settings for buttons. - 2026-02-15: Added popup edit form. Added various parameters to work with it.
- 2026-02-09: Fixed bug with sums when field is empty.
- 2026-02-07: Simplified code for function fxc_String_To_Float.
- 2026-02-06: Updated formatting functions. Added csv markup option to set decimal places from 0 to 9 and automatic for selected columns.
- 2026-02-04: Added missing confirmation messages for 'expor', 'import' and'csvsum' csv actions.
- 2026-02-01: Fixed issues with sums in csv templates and handling of "decimal comma" number input. Change that'num=' parameter needs to be set also for tables based on csv templates as well as auto-tables, in order that sums can be shown in footer for columns with number data.
- 2026-01-29: Added functionality to store sums of columns into PTVs. Fixed multi-line bug. Added capability to use ¦ as line break tokens, instead of backslash \. Changed behaviour of using single backslash to double backslash for inserting line-break token in inpt.
- 2024-07-24: Changed csv markup directive so pmwiki conditionals work better.
- 2024-04-20: Added 'filterable' optional parameter, for addition of a filter input box to tables, if ExtensionHub and Filterable extension is installed. Fixed default for option 'class'.
- 2024-04-15: Added option for setting auth level, added parameters for setting labels. Refactored code to reduce auth level checks.
- 2024-04-11: Fixed use of label in csv-edit button markup.
- 2024-04-06a: eliminated filter functions, needs Fox 2024-04-06 min!
- 2024-04-06: Added option to display a 'Save as New' button.
- 2023-12-20: Added 'multiline' optional parameter, to set multiline textarea input controls for specified column fields.
- 2023-12-15: Changed markup for edit links, and using form buttons instead. Added icons for delete and edit buttons. Added csv file editing capability. Moved csv editing functions from FoxEdit to foxcsv.php.
- 2023-12-11: Fixed sums for formatted numbers.
- 2023-12-10: Added support for multi-line strings in fields. Added support for field enclosures. Added toolbar option. Added number formatting for selected columns. Reworked code for auto tables to allow multi-line values in table cells. Renaming of functions, general code improvements, especially for handling of quotes in strings and as enclosures.
- 2023-12-02: Change to FoxCSV_Get_Row_Key() to allow new row insertion below any row.
- 2023-12-01: Added options for reverse index and reindex. Fixed bug in FoxCSV_Update(), which could update wrong row when rows were equal.
- 2023-11-30: Added option new=top, to put new item just below header. Fixed bug with trimming separators. Fixed trim tool.
- 2023-11-29: Added template switch directives
(:template first:),(:template each:),(:template last:). Added template variable{$$SUM_<fieldname>}for column sums. - 2023-11-28: Fixed sums. Some code refactoring.
- 2023-11-26: Added option to rename Text header field. Changed markup to use
$MarkupDirectiveFunctions. Fixed copycsv to cope with multiple csv directives. - 2023-11-25: Added capacity to import/display .txt files. Fixed some issues with file import/copy.
- 2023-11-23: Added option to import csv files and copy filtered csv text. Added more error trapping, warnings and automatic correction of invalid header names. Added header edit link to auto template.
- 2023-11-21: Added options for alignment in auto tables, added display from csv file, added switch options to turn off class=sortable and editlinks in auto tables.
- 2023-11-20: Improved sorting, added multi-column sort and option order="...".
- 2023-11-19: Fixed class=sortable for when table displays sums in table foot.
- 2023-11-18: Added markup to display specific items from csv. Added option to add a footer row for column sums. Changed behaviour of query.
- 2023-11-17: Simplified markup definitions. Fixed tab \t input as separator.
- 2023-11-16: Changed csv action button markups. Added markup expression to give new idx number for custom forms adding data rows. Major code modifications. Added more action buttons. Added error catching to catch bad input.
- 2023-11-15: changed csv parsing function
- 2023-11-14: added edit capacities in conjunction with FoxEdit. Added various csv modification functions, including adding indexing. Changed the way FoxCSV uses Fox.
- 2023-11-07: initial release
See also
- Fox - Form processor to add, replace, copy, delete content plus upload files and send email notifications using templates and Input markup
Contributors
Comments
See discussion at FoxCSV-Talk
User notes : If you use, used or reviewed this recipe, you can add your name. These statistics appear in the Cookbook listings and will help newcomers browsing through the wiki.