
ImagesTemp
Placing images in pages
To place an image into a page, enter the address (url) of the image into the markup text. Any alternate text (used for tooltips and for browsers that do not display images) is placed in double quotes immediately following the image url.
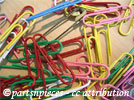
Paper clips are fun to work with.
Images can also be specified as uploaded files (i.e., Attach:image.jpg) and using InterMap links. Any location that ends in .gif, .jpg, .jpeg, or .png will be automatically treated as an image. (See Notes below for image files that lack extensions.)
To create a link to an image (like http://www.pmichaud.com/img/misc/pc.jpg as opposed to displaying the image itself), use double brackets to mark the link, as in [[http://www.pmichaud.com/img/misc/pc.jpg]] or [[Attach:image.jpg]].
To have an image link to another location, use the image as the link text as in [[http://www.pmwiki.org | Attach:image.jpg"PmWiki"]].
Captions and floating images
A caption can be added to an image using a vertical brace and the caption text.
Figure 1
Normally, images are displayed "in line" with the surrounding text. To left or right-align an image with text wrapping around it, use the %lfloat% or %rfloat% WikiStyles.
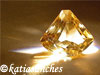
Rock on!
The image is left-aligned, and the text wraps on the right side of the image.
Lorem ipsum dolor sit amet, consectetur adipisicing elit, sed do eiusmod tempor incididunt ut labore et dolore magna aliqua. Ut enim ad minim veniam, quis nostrud exercitation ullamco laboris nisi ut aliquip ex ea commodo consequat.
Use the %lframe% or %rframe% styles to float an image and place a frame around the image and its caption:
Rock on!
The image is right-aligned, and the text wraps on the left side of the image.
Lorem ipsum dolor sit amet, consectetur adipisicing elit, sed do eiusmod tempor incididunt ut labore et dolore magna aliqua. Ut enim ad minim veniam, quis nostrud exercitation ullamco laboris nisi ut aliquip ex ea commodo consequat. Lorem ipsum dolor sit amet, consectetur adipisicing elit, sed do eiusmod tempor incididunt ut labore et dolore magna aliqua.
Use %center% to center an image. Use %right% to right align an image, without floating it.
Paper clips are fun to work with
Rock on!
Resizing images
To resize an image, use %width=50px% or %height=50px% in front of an image. The %thumb% wikistyle is a helpful shortcut for %width=100px%.
Resizing an image only affects how it is displayed in a browser; it does not reduce the transfer size of the image itself.
Resized images using %thumb% can also be floated with frames, as well as made into links.
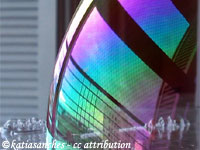
Bubble
Paper Clips
Notes
- An image file that lacks a correct extension can be displayed by addition of a "false" extension to the URL. For example, if the url is
http://www.example.com/script/tux, add a fake query string on the end with the desired extension (e.g.,http://www.example.com/script/tux?format=.png).
See also
- Cookbook:BackgroundImages - adding background images to divisions, tables and table cells.
Credits
The images on this page were obtained from http://www.flickr.com and are redistributed under a Creative Commons License.
<< | DocumentationIndex | >>